Traffic flow is the most important aspect of a warehouse design, but it is far from the only consideration. Here are several tips to help you get the best from your warehouse layout design.
A warehouse layout directly impacts the facility’s bottom line. Every inefficiency, such as clogged aisles and misused storage space, means each task takes longer than it should, wasting money and time (and as the saying goes, “time is money;” so, inefficiencies waste double money, I guess). In contrast, a design that makes efficient use of the warehouse floor plan can help to improve your operating costs and boost your bottom line.
When it’s time to design (or redesign) a warehouse area, there are many factors to consider. Initially, it may seem like storage space is the most important issue, but that’s not necessarily the case. Imagine a warehouse filled with racks that stack so high you lose sight of them in the clouds. However, there are several bottlenecks and inefficiencies leading to and from those racks that cause forklifts to stack up and shipping delays.
A warehouse may have plenty of storage space, but without efficient traffic flow, you may find that a warehouse floor plan actually costs money in wasted employee hours, delayed shipments and fines. You may also see clients dwindle as they choose to work with another local area warehouse.
It is essential to be thoughtful and focused throughout the process of developing a warehouse layout. Your plan should efficiently use both the physical space you have and the storage space you create to maximize the potential of your warehouse team. With the correct planning, you can make the warehouse design of your dreams.
The four levels of warehouse activity
There is no single “correct” way to design a warehouse. Every industry has different needs and, even within the same industry, those needs often differ from organization to organization.
However, there are four general levels of warehouse activity. Where your business falls within the following quadrants will affect the type of storage you purchase, the amount of space you need and the kind of material handling equipment you use (for more, check out the handy forklift buyer’s guide).
- Low activity with low storage requirements: These warehouses are typically small operations. Inventory is handled manually with pallet jacks, small forklifts and cherry pickers.
- High activity with low storage requirements: Because there is minimal inventory, these warehouses tend to have very little storage overflow.
- Low activity with high storage requirements: Since a large amount of inventory sits for a while, these warehouses often have very high and very deep racks.
- High activity with high storage requirements: These warehouses are fast-paced, large-scale distribution centers with automated material handling systems and extensive and varied storage arrangements.
Six parts of the warehouse area
When creating your initial warehouse outline, the following six areas must be perfectly defined.
Loading and unloading zones: Inventory is brought in or taken from the warehouse at these areas. Be sure to allow adequate space for loading and unloading. There are two options for loading and unloading zones.
- Integrated: When loading and unloading occur in the warehouse, the zones are integrated. The main benefit of integrated docks is that loading and unloading happen quickly because the process is part of the traffic flow of the warehouse. However, the downside is that these zones take up significant space in the warehouse.
There are two types of integrated loading and unloading zones: platforms and flush docks. Platforms are basically a runway between the truck and the dock. A warehouse needs platforms when there are safety issues with the inventory or the internal warehouse temperature is regulated and must be maintained, such as cold storage.
With flush docks, there is no separation between the truck and the warehouse. A truck reverses until it connects with the doorway, creating an airtight seal that helps maintain the warehouse’s temperature.
- Independent: For independent zones, loading and unloading occur in areas separate from the warehouse. The benefit of independent zones is that it is faster for trucks to load and unload because they can quickly enter and leave the area (as opposed to backing into the docks). However, the downside is that, because loading and unloading occur at an outside warehouse area, new inventory is not an integrated part of the warehouse’s work cycle until it is brought inside.
Reception area: Once inventory is unloaded from a truck, it heads to the reception area, where the goods are received and sorted. This area is also used for quality control to ensure that the inventory matches the order form and it arrived undamaged. Reception is where pallets may be split into smaller units for storing, if necessary. Once the products are scanned into the system, assigned a slot and labeled, they are ready to move to storage.
The reception area should be as large as your space allows and completely separate from all other areas of the warehouse.
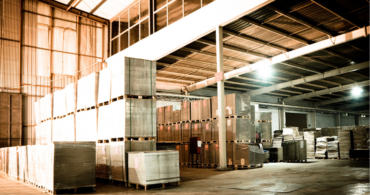
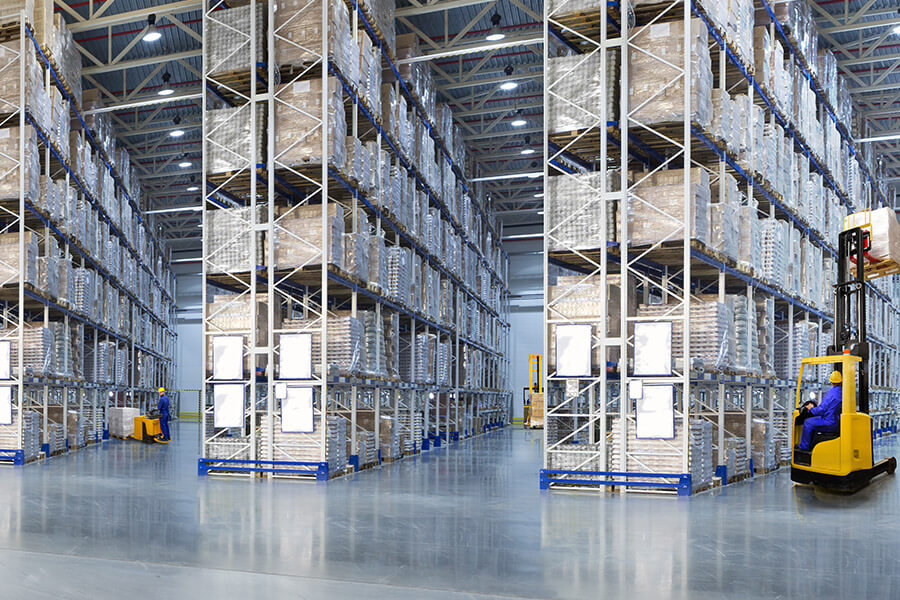
Storage area: This is the first thing most people picture when they think of a warehouse. However, for the majority of warehouses, storage does not dominate the warehouse space. In fact, when creating a storage layout design, it is recommended to allocate no more than 22-27% of available space to storage. That range means you efficiently use your available space and your warehouse team has enough room for picking, loading, unloading and other warehouse functions.
Inventory is stored in many ways, including directly on the floor, stacked on top of one another and shelved in racking units. There are many different types of warehouse storage equipment. The kind you choose largely depends on the inventory itself, its packaging and how quickly inventory moves in and out of the warehouse.
There are also two different styles of storage. A warehouse may need only one or both styles, depending on its activity level.
- Static storage: In static storage (also known as a fixed space system), every item has an assigned location that is always the same. For example, product A is always in row 1, sections 1 and 2, product B is in row 1, sections 3, 4 and 5, etc. The advantages of a static storage system are that inventory is simple to find, it is easy to see when a product is running low and it is convenient to set up a “first-in, first-out” organization. The main con is unused storage space. When Product A is running low, the racks sit unused and empty.
- Dynamic storage: In dynamic storage, products do not have an assigned location. Instead, inventory is placed in any available location or a location based on the product’s demand. For example, if Product B starts outselling Product A, it will get a spot closer to the loading dock while Product A heads to a less accessible area. The advantages of dynamic storage are that it makes the best use of storage space (few empty spaces and you can store a wide variety of products) and, when the system is working efficiently, it makes the best use of an employee’s time. The cons are that when product demand drops, the system is less efficient and constantly shifting inventory can make it harder for employees to find products.
Order picking area: An order picking area is only required when inventory needs to be modified before shipping. For example, if only three items from a pallet containing twelve items need to ship, that pallet heads to the picking area to fulfill the order. Order picking areas are either immediately adjacent to or in the storage area. Not every warehouse needs an order picking area.
Dispatch area: The dispatch area is where inventory is packed and prepared for shipping. Even if the packing step is unnecessary, the dispatch area serves as a waystation for ordered items.
The dispatch area needs to be located between the storage area and loading docks, so inventory naturally and easily flows from one space to another. If a warehouse has loading and unloading zones in the same area, the dispatch area is usually located next to reception. However, if loading happens in a place that is removed from unloading, the dispatch area is also set far apart from the reception area.
Service areas: Service areas are the “everything else” in a warehouse, such as offices, break rooms, bathrooms, changing rooms, battery recharging areas, etc. Service areas are spread throughout the warehouse, generally where they are most strategic and logical. For example, some warehouse layouts include a second story for offices over reception and dispatch areas. Bathrooms are placed in areas that minimize employee downtime. Recharging stations need a ventilated area and are placed apart from heavily trafficked areas to decrease possible accidents.
The three different warehouse layouts
There are three main warehouse layouts, and each has a unique flow. In general, none of these layouts is better than the others. However, based on your specific needs, activity level, type of inventory and warehouse size, there will be one that’s better for you. Just know that in each following warehouse design, it’s a given that the varied service areas are scattered hither and yon.
U-shaped design: The U-shaped design is the most common warehouse layout because its streamlined traffic flow works for all warehouses, from the smallest to the largest. For a U-shaped design, picture a rectangle (the warehouse outline) and remove the middle to form a boxy U. The loading docks rest at one end of the U, followed by the reception area. The middle of the U is storage. For warehouses that need both dynamic and static storage, static is typically placed in the center, flanked on both sides by dynamic storage. On the other side of the U are the dispatch area and loading docks. The center of the warehouse is reserved for service areas, additional storage, etc.
The main advantage of the U-shaped design is that unloading and loading occur side-by-side or on the same dock. With both tasks occurring on the same side of the building, employees can unload a truck and, as they move the inventory to receiving, another team can immediately load a shipment on the same truck.
However, if work is not performed efficiently, this advantage will quickly turn into the U-shaped design’s most significant disadvantage: bottlenecks. Loading and unloading occurring in such proximity increase the possibility of both traffic flow and shipping logjams.
I-shaped design: The most significant difference between a U-shaped design and an I-shaped design is that the unloading and loading docks are on opposite ends of the warehouse. An I-shaped warehouse is pretty straightforward. (Get it?) An I-shaped design is also known as a “through-flow” warehouse because it’s a straight shot through the warehouse from unloading, reception, storage, dispatch and, finally, unloading.
The advantage of the I-shaped design is, well, we’ve kind of been hammering the advantage, its straight flow through the warehouse, which makes the best use of warehouse space and dramatically limits bottlenecks by eliminating back and forth movements.
The main disadvantage of this setup is that the separate docks require more equipment and the extended space may require additional employees, which increases operation costs.
L-shaped design: The L-shaped design is the least common of the three warehouse layouts and instead of an operational reason, it is typically selected for the practical reason of accommodating an L-shaped building. The L-shaped design is similar to an I-shaped design, except that the loading and unloading docks are separated by a 90-degree angle instead of a straight shot. The L-shaped design is also considered a “through-flow” warehouse.
The advantages and disadvantages of an L-shaped design are similar to those of an I-shaped design. The layout reduces bottlenecks and inefficiencies, but it requires significant space, equipment and employees to be effective.
12 additional tips for your warehouse floor plan
Know your objectives. Anyone thinking about designing (or redesigning) a warehouse needs to answer three questions before they can begin.
- What do they have?
- What do they need?
- What do they want?
Answering these questions will help clarify your objectives for the warehouse layout. These objectives should align with the company’s intentions for the warehouse. Your objectives will likely be a mix of the big picture (providing superior customer service, reducing costs, etc.) and more focused (increasing efficiency, maximizing space, etc.). If you can find the balance between your objectives, you are on your way to a successful warehouse design.
Function is always paired with cost. The warehouse of your dreams is inexorably linked to the realities of your budget. For example, if the warehouse stores perishable goods, the cost of refrigeration needs to be part of the budget as well as any local and federal statutory requirements. The location of administrative offices is another consideration because they may need to be placed near a specific warehouse area for organizational reasons.
As you add to and edit your warehouse floor plan, keep in mind the warehouse construction cost per square foot and contrast that with the anticipated revenue per square foot. You will also want to estimate how quickly the facility will begin to turn a profit (i.e., pay for itself). Since many unpredictable and unavoidable factors may impact revenue, it’s good to have a plan in place should the warehouse income fall short of expectations.
Determine the spatial needs of every warehouse area. It is not enough to know what you need in a warehouse. You also need to understand how everything fits together. If you overstate the importance of one area or understate the impact of another, it will negatively affect the flow throughout the warehouse. It is crucial to understand how much space each portion of the warehouse requires and how those portions interact to effectively create a warehouse layout design.
Understand your inventory and how it moves through the warehouse. This objective goes beyond the movement described in “the three different warehouse layouts” section and delves into your actual inventory. Which products have a high input and output rate? How many of these products are generally on the shelves? Which inventory tends to be static, and how many SKUs tend to be on hand?
In addition to product rotation, you also need to prepare for the size and shape of your inventory. This important information not only determines how much space you need to store these items but also the necessary width of aisles between inventory storage, anticipated foot traffic and the types of forklifts, other material handling equipment and forklift accessories you need.
Understanding your inventory and how it rotates through the facility plays an essential role in creating an effective warehouse outline.
Ensure traffic flows smoothly to the reception area: Once inventory is unloaded, it moves to one of the essential areas of the warehouse: the reception area. If something goes wrong at reception (inventory is misidentified or miscounted, damage is overlooked, etc.), it negatively impacts every warehouse area.
When inventory backs up at the reception area, it causes inefficiencies and can lead to mistakes. You can improve efficiency by including equipment like a pallet dimensioner between unloading and reception. A pallet dimensioner is a ceiling-mounted machine that uses infrared sensors to measure the volume of a container. This automated procedure helps speed up the receiving process. When this information is coupled with weight, you get a complete picture of how much room is necessary for every container entering the warehouse. It is also essential to have allocated enough employees, forklifts and pallet jacks to clear the area quickly.
Test your warehouse layout before installation. Before installing pallet racks, shelves and equipment, perform a run-through to ensure that the warehouse outline you created is effective and free from bottlenecks. Use masking tape to create silhouettes of the unloading, reception, storage racks, dispatch, loading and service areas. Then have a group run drills carrying boxes, controlling pallet jacks and imitating driving forklifts through the area. If you notice any issues, they will only become worse once everything is in place. This is your opportunity to correct problems and ensure that your warehouse flow works best for your operation.
When designing the internal warehouse layout, don’t forget the outside warehouse area. As you carefully plan the internal flow of your warehouse, be sure that you don’t overlook the outside of the building. An external outline shows the roads, rail lines and other transit networks that lead to the facility and the traffic flow around the warehouse and parking areas. An outside warehouse layout is essential because you don’t want to begin the inventory’s journey through the warehouse with bottlenecks in the unloading and loading areas.
Plan for growth. With the growing reliance on ecommerce (and consumer expectations for speedy delivery), logistics and distribution are crucial to today’s economy. If this trend continues (and there’s currently no indication that it’s slowing down), there is a good chance your shiny new warehouse may need to expand sooner than you think.
That’s likely a good problem to have, as long as you’ve built some contingencies for expansion. First, if your building is jammed next to a bunch of other buildings, your opportunity for growth is severely hindered. So, purchase property that will support extensions, additional facilities and new parking and roads.
Also, discuss the idea of possible growth with your contractor. They will have ideas to make adding an extension easier. Some possibilities include building extra room for additional plumbing and wiring and adding pre-planned knockouts for doors, loading bays and other openings.
Be sure to light ‘er up. Often, so much time is spent planning the storage layout design and other areas of the warehouse floor plan that not much thought is given to the ceiling.
However, it is essential to adequately light the interior of your warehouse. When areas of your warehouse are bathed in shadows, warehouse employees cannot effectively perform their jobs. It is harder to store and locate items, creating unnecessary bottlenecks that could easily be solved with enough lighting. However, a warehouse can have too much lighting. When a work area is over-lit, it creates an uncomfortable environment for employees and will affect their productivity.
There are three options for warehouse lighting: high-intensity discharge (HID), fluorescent and light-emitting diode (LED). For years, the only options warehouses had was HID lighting, and it is still the lowest initial cost of the three choices. However, the prices are likely to increase over time because these bulbs wear out faster. They also need time to warm up before reaching their full brightness and must cool down after being turned off before they will power on again.
Fluorescent lights are more energy-efficient than HIDs and economical, too. However, because they do not function well in extreme cold or heat, they are not suitable for refrigerated warehouses or ones that get very hot. They also quickly wear out by being turned off and on frequently.
LEDs are the most energy-efficient and versatile option of the three. Not only do they use less power, but also last longer, up to 100,000 hours, meaning your employees spend less time on a scissor lift straining to replace light bulbs. A downside is that LEDs don’t like high temperatures, but it typically takes extended time above 80 degrees Fahrenheit to affect them.
A few factors impact the type and power of lighting your warehouse needs. The amount of space between the floor and the ceiling matters because the lighting needs to be brighter and spaced further apart as the area increases. Also, the type of inventory determines your choice of lighting because smaller products need more lighting than larger packages.
Aid traffic flow with signage. Daily commuter traffic would be a jumbled mess without traffic signals, stop signs and clearly marked lanes. The traffic through your warehouse is no different. As your warehouse design comes together, include pedestrian and equipment lanes to ensure that employees and visitors safely navigate your facility. Signage that clearly labels the lanes and specific areas of your warehouse further improves warehouse safety and helps streamline the flow of products and people.
Keep a sharp eye out for non-productive areas. Sometimes wasted space hides in plain sight on a warehouse layout design. One common example of wasted space is aisles that are too wide. By correcting this error, it may be possible to fit another storge rack in the facility (however, by all means, do not make your aisles too narrow).
Another possibility for wasted space on a warehouse layout is a design with no built-in flexibility. The needs of a warehouse change over time, and your completed build needs to be prepared to accommodate changes like expanded product lines or differently sized inventory.
Be extremely familiar with the local building codes. Yes, your contractor should know all relevant building code information, but it never hurts to educate yourself. There are piles of regulations and amendments that apply to your specific warehouse. Some possibilities include Americans with Disabilities Act (ADA) requirements, fire protection, racking permits, inventory storage, proper ventilation and safety signage. It’s a lot, and it’s your responsibility if a code is violated. You do not want to be on the hook for a docking bay door with improper clearance. Not only will you face a fine, but you’ll have to pay to widen the space and install a new door.
Creating a perfect warehouse layout is worth the effort. Traffic flows through your space better and your employees can operate at peak efficiency. Once your ideal warehouse is up and running, please reach out to Texas Motive Solutions for all of your forklift batteries and accessory needs. We have decades of experience in this industry and are always ready to lend a hand. Give us a call at (888) 316-2459 or fill out this form.